OSPF
Today I want to show a demonstration on how to configure an OSPF.
- OSPF is a routing protocol. Two routers speaking OSPF to each other exchange information about the routes they know about and the cost for them to get there.
The Goal of this Lab Topology
- Achieve dynamic reachability between all the different subnet on the following network
- Using OSPF, routers will be able to ping across neighboring routers
- Subsequently affiliated switches will also be able to ping across network
- We will use the Lab Provided below to configure an OSPF (Single Area 0)
Steps Overview
Configure Router port interfaces (Correct Subnet)
Enable port Interfaces
OSPF Configuration applied
Ping Test to confirm dynamic reachability
Step 1
Configuring Router 1/2/3
Proper IP address applied to its connected Interfaces
Port Interfaces all enabled
Once all Interfaces have been assigned IP Address & Interfaces all enabled, you should see the following diagram
- All neighboring port Interfaces should be green
Step 2
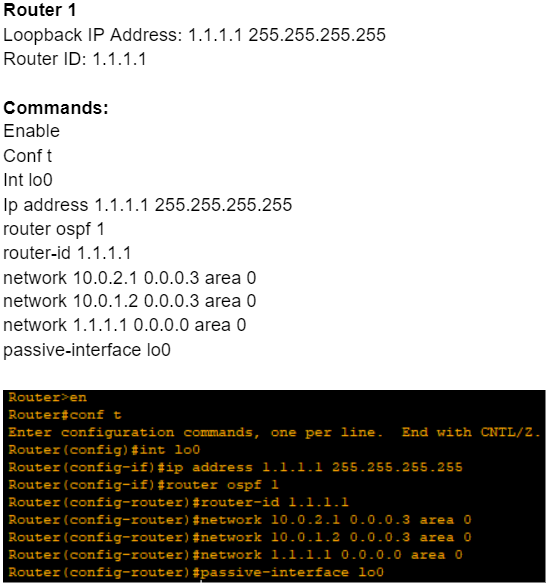
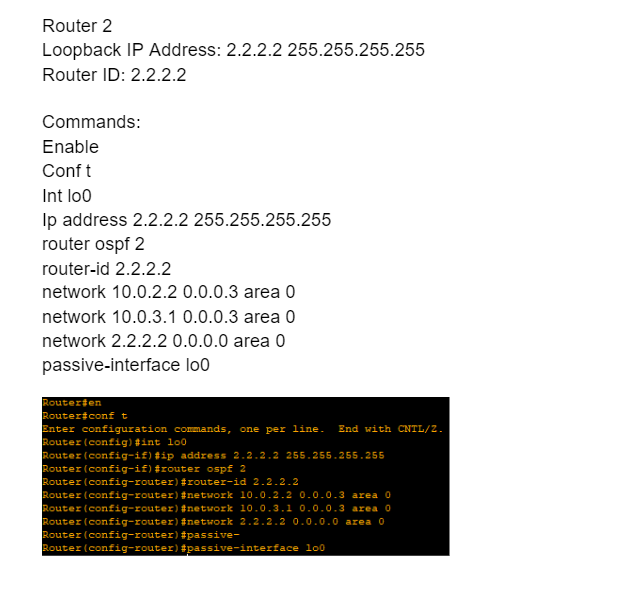
Configuring OSPF on Router 1/2/3
Create Loopback IP Address (Always stays up/up State)
Apply OSPF config for individual Interfaces
Please Note that there are variety of method of applying OSPF config
Example : network 0.0.0.0 255.255.255.255 area 0
This specific command would apply OSPF to entire Interface at once
(Not recommended)
Step 3
Test ping once configuration is done
- If all the configuration is properly configured, you would be able to ping one router to another
This is how you setup dynamic routing using OSPF to achieve reachability between all the different subnet
- Chris


